The scissors (or crop tool) allows you to cut out a portion of the page.
In this way it is possible to extract the specifications of a product, a photo, a dimensioned drawing… and subsequently send the image by email or insert it into a project or quotation.
In this article I will explain how to best use this tool and how to take advantage of new features that we have recently introduced which make it even more practical and versatile.
THE CUTTER
The way it works (you may already know it) is very simple: select the scissors  tool (or press X ) draw a box and finally drag it to the Desktop.
If the crop didn’t turn out well on the first try, press Esc to delete it, then X, do it again and when it’s ok, drag it to the Desktop.
Now the crop is an image saved on your PC (or Mac) that you can email or insert into a Word or Excel document.
It certainly takes much less time than putting the price list in a scanner and scanning the page… and the result is certainly better.
THE RESOLUTION
The cutter typically generates high-resolution (216 dpi) images regardless of the magnification level you are viewing the document at.
A high resolution crop is suitable if the image is to be printed. However, if the image is sent by email to be displayed on screen, the maximum resolution could generate unnecessarily large images, especially if the cropped area is large.
For this reason we have added the ability to select lower than standard resolutions in order to generate appropriately sized crops.
CHANGE RESOLUTION
If you right-click on the scissors tool the selection menu appears:
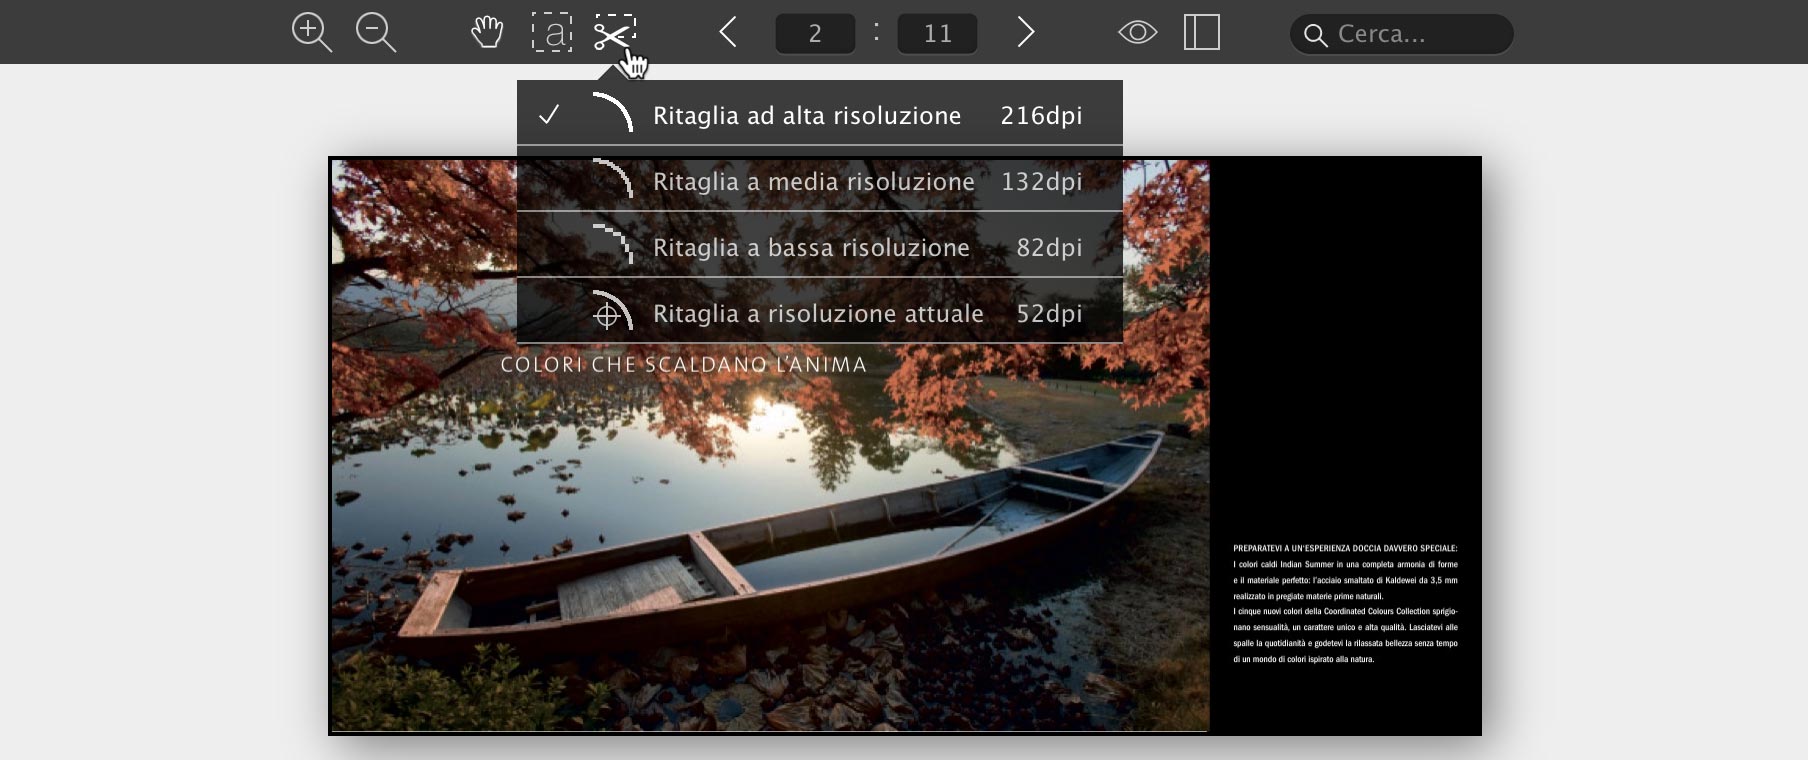
A second click on the desired option selects the corresponding resolution which will be maintained for each subsequent cut.
High resolution is the default value of 216 dpi
Medium resolution corresponds to 132 dpi: the same crop acquired at this level will have a size just over half that of high resolution.
Low resolution corresponds to 82 dpi
The fourth Crop to current resolution option is “special”: cropping is done at the same resolution at which the image is displayed on the screen so what you crop is exactly what you see.
HOW DO I CHOOSE THE RESOLUTION?
If the image needs to be printed, it remains at high.
Use high also if the image will be displayed on the screen but it is a small crop full of details, so it is important that it is well enlarged.
For a photograph that takes up half a page or more, low is fine.
For a table or a technical drawing with writing and details medium is the most appropriate.
If you don’t know what to choose, the solution is very simple: select Crop at current zoom level, find the zoom level you want to produce by pressing + and – and finally cut. Exactly what you see on the video will come out.
AN EXAMPLE
The image below shows a page from the 2017 price list of a well-known manufacturer. A small crop has been selected at the top center of the page. The image generated by cropping at the various available resolutions is displayed superimposed on the same image.
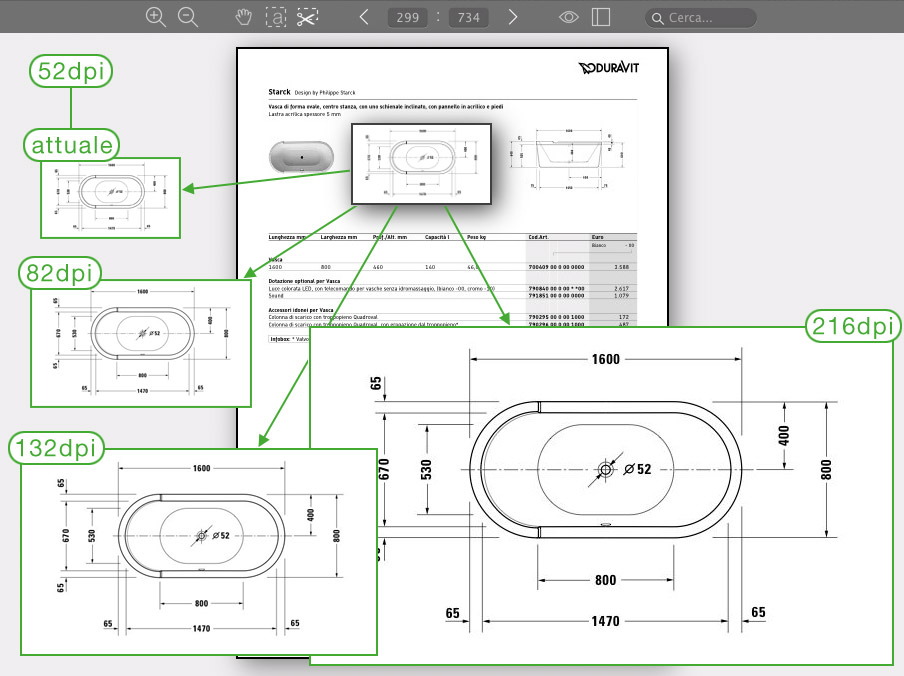
If you want to try you can directly access that document (that page) by clicking on this link
TOO COMPLICATED?
I don’t think so, it’s actually harder to explain than to do.
Take a minute, open a random price list and do a couple of tests…
And if you have any questions don’t hesitate to write to us!